
 |
 |
|
How reliable is your memory? Pretty good, huh. OK, let's test that theory. What did you have for dinner last night? How about the night before that? Three nights ago? Four? If you can accurately recall your dinner meals for each of the last six nights, you're memory is probably better than most. Most people think they have a good memory and most people, as it turns out, are wrong. According to The Innocence Project, eyewitness misidentification is a factor in approximately 75% of overturned convictions. This should be more than a little troubling when you consider that an estimated 33,000 to 50,000 innocent Americans are convicted each year based largely on erroneous eyewitness testimony. So, how reliable is your memory? How about your hiking partner's? Would you bet your life on it?
On the afternoon of the seventh day of this hike, my memory was put to the test and it failed...miserably. Rob Jones, Chris Forsyth and I began the day in Unkar Creek. We camped the night before at a weak flow of water about a mile downstream from the main junction. Breaking camp at 7:30 AM, it had taken us about an hour to head back up canyon, turn left into the southwest arm of Unkar and arrive at the base of a bypass. There is an impassible dry fall where Unkar cuts through the Tapeats and Shinumo Quartzite layers, and a bypass on drainage right (hiker left) leads up through a break in the Tapeats/Quartzite. After topping out, we angled to our right back into the main drainage and followed this up to the saddle overlooking Vishnu Creek Canyon. This drainage is defined by its generally narrow confines, lots of boulder hopping and a sporty little ascent of about thirty feet on drainage right (hiker left) near the top. This last ascent features some sketchy hand and toe climbing on a narrow track where you need to be cautious about the fractured, crumbly Redwall holds. I had successfully hiked solo from Nankoweap to the South Rim in April 2011 and clearly recalled this climby section from that trip.
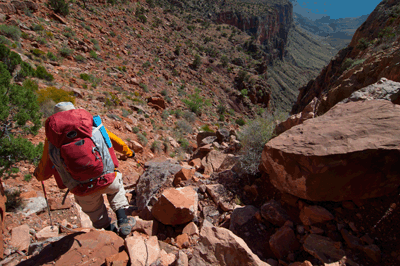
Once past this climb, ascending the steep, rocky slope to the saddle is still a bit of work but fairly straightforward. Rob, Chris and I arrived at the saddle at 12:00 Noon and were treated to spectacular views of Jupiter Temple, Krishna Shrine and, of course, Vishnu Temple. Before making the descent into Vishnu Canyon, we decided to break for lunch. And since our route into Vishnu would be via a break in the Redwall around the corner to our right--that's how I recalled entering Vishnu during the 2011 hike--we decided to head out to a point atop the Redwall overlooking the junction of the northern and main arms of Vishnu Canyon. Lunch passed in relaxed comfort in the shade of a Juniper tree. At 1:30 PM, we left the overlook and headed up the north arm in search of a break through the Redwall. It was a break we would not find because the break does not exist.
After about thirty minutes, we came to a drainage leading to an impassible vertical pour off. It was weird. The place seemed both right and not right at the same time. I recalled heading up the side canyon to a break that led into the creek bed but this place didn't seem at all familiar. Chris dropped his pack and scouted ahead. Though he was probably gone no more than thirty minutes, it felt like hours. The entire time I racked my brain for an answer. How could this not be the right way? It's what I remembered. When Chris did return, his report was clear: there is no descent route through the Redwall in the north arm. Despite my memories from that 2011 hike, I had to acknowledge the obvious. If the descent route through the Redwall did not originate in the north arm, it must begin back at the saddle. Uncertain of what we would find, we began the long trek back the way we'd come. It was about 3:00 PM when we began a cautious descent of a scooped out drainage leading to the fault below the saddle. Almost instantly, we noticed signs of previous traffic through this area. Whether forged by hikers, deer or other animals, we were definitely on a route. Then we saw the boot prints and our suspicions were confirmed. The descent from the Unkar saddle into Vishnu Canyon begins with a route through the fault below the saddle.
This was the second time in as many days my memory of that 2011 solo hike had failed me. The day before while hiking down the north arm of Unkar, we passed a cairn on drainage left. I clearly recalled from two years before that passage down the main drainage was stymied by a pour off in the Tapeats/Shinumo Quartzite and that I had bypassed this obstacle by going to the left. So, we exited the drainage and began hiking cross country in search of the bypass. I didn't recall the bypass of the pour off as being terribly significant. Boy, was I wrong. Not only did we end up descending about three hundred feet but much of the route goes down a talus slope that requires total concentration to avoid slipping and falling on the loose rocks. The slope leads to a minor drainage which merges into the main arm just below the Tapeats/Quartzite narrows. While we rested in the shade, I kept looking back up the route we'd just descended and thinking, "How could I not remember that?"
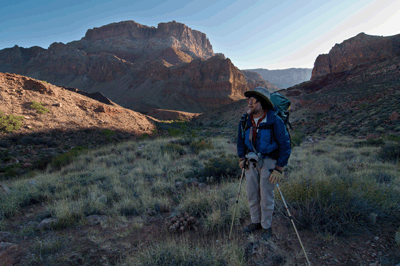
In November 2012 when Rob Jones invited me to join him on this hike, I was immediately interested. I had soloed Nankoweap to the South Rim in April 2011. The trek had gone well enough but a couple of sections had given me some trouble. I had made a critical error in judgement the first day by pushing on from Nankoweap Creek to Kwagunt Creek. Making this initial saddle climb along the Butte Fault route in the heat of the afternoon had left me dehydrated and slightly nauseous. I spent the next two days recovering from that mistake while continuing to hike the Butte Fault route south into the east arm of Carbon. On my fourth day, I made the Redwall ascent from upper Lava to a saddle overlooking the north arm of Unkar. My route finding on that day had not gone well and it had taken me nearly seven hours to cover the one-and-a-half miles from Lava to the Redwall saddle. Finally on my sixth day, I had decided to forego the high saddles route from Vishnu Creek to Clear Creek, choosing instead to follow the Tonto level around Hawkins Butte, Angels Gate and The Howlands. This wasn't a mistake, per se, but simply a decision based on my discomfort with the idea of going solo up to, across and down through the Redwall.
Hiking with Rob would afford me an opportunity to revisit the Butte Fault route, correct some route finding errors and follow the high saddles route from Vishnu to Clear Creek. And there were other incentives. Rob's itinerary would allow me to return to the exact location of the rock slide which had left me pretty banged up on a 2010 hike. I had returned to the area during my 2011 Nanko-South Rim trek and that had given me a sense of empowerment at being able to depart the location on my own terms. Returning and retracing my steps up through the Redwall break would finally bring closure to that chapter of my Grand Canyon hiking career.
So, I accepted Rob's invitation with much anticipation and a slight touch of apprehension. I was looking forward to repeating the route and addressing the mistakes I'd made on my 2011 trek. I also knew there was no guarantee the changes I had in mind would produce an improved outcome. That uncertainty combined with the fact this would be the first time Rob and I would hike together introduced an element of the unknown. This was the source of my apprehension, which can be good if it produces a heightened focus on the task at hand when needed. On this trip, Rob and I would be joined by a third person. Chris Forsyth planned to meet us halfway into the excursion. On the fourth day, Chris would hike down Tanner trail to the river, continue upstream along the Beamer trail to a place where he could pack raft across the Colorado and connect with us at Lava beach. From there, the three of us would complete the hike together.
We were assisted in this endeavor by my long time hiking partner, Dennis Foster. Dennis had graciously offered to give Rob and me a ride to the Saddle Mountain trailhead, the starting point for this ten-day expedition. On the morning of April 15, 2013, Dennis and I drove separately to Rob Jones's house in University Heights. After transferring our gear to the back of Dennis's truck, Rob sat shotgun in my Isuzu Rodeo for the drive to the Backcountry Information Center (BIC) at the South Rim of Grand Canyon. The Rodeo would be our ticket back to Flagstaff at the end of the ten days. So, we cached it in the BIC parking lot, loaded gear into the back of Dennis's truck and began the four-hour drive to House Rock Valley. It was 10:30 AM on day zero.
After crossing Navajo Bridge, we stopped in Vermilion Cliffs at Lees Ferry Lodge for a late lunch. My bar-b-que bacon burger was savored with the enthusiasm of a man eating his last meal, which seemed appropriate considering this would be our last civilized meal before reaching the South Rim some ten days hence. The jackalope trophy mounted to the wall above the entrance was, itself, worth the price of the meal. As we were the only customers in the joint, we also enjoyed some casual conversation with the staff. As with all good things, lunch eventually came to an end. Our meal finished, we continued west along Highway 89A to Buffalo Ranch Road, where we turned left and drove south along the dirt track to the Saddle Mountain Wilderness Area trailhead parking area. This is where we made camp the night before our trip would officially begin. Overnight, a late winter storm scudded into the area, bringing cool temperatures, threatening clouds and gusting winds.
Day one of the expedition dawned gray and cold. Dennis, Rob and I left the Saddle Mountain Wilderness parking area just before 7:00 AM to begin the three-mile trek up Trail 57 to Nankoweap trailhead. As we walked through a light sprinkling of graupel, I found it hard to believe I had actually debated whether or not to pack my rain jacket. Dressed in multiple layers to fend off the cold and wet, I was cursing myself for leaving behind my polar fleece cap. It was a thought that recurred frequently over the next couple of days as winter held court over northeastern Grand Canyon. We arrived at the Nankoweap trailhead shortly after 9:00 AM. After saying our good-byes, Dennis headed off for the summit of Saddle Mountain. After summiting, he would return to the parking area and drive back to Flagstaff. Rob and I ventured below the rim, entering Grand Canyon on Nankoweap trail. Constructed by John Wesley Powell, Charles Walcott and others in 1882, the Nankoweap trail carves a razor-thin track along the base of a Supai wall before following the sketchy contour of Tilted Mesa ridge and descending into the basin of Nankoweap Creek. Rob and I reached the end of Nankoweap trail at 4:00 PM, entering into Nankoweap Creek bed. Eight days would pass before we would again be on a constructed trail.
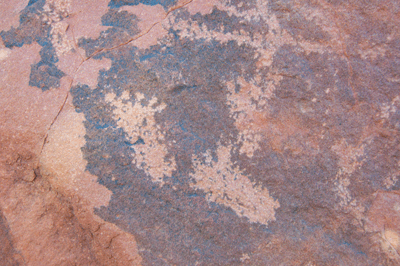
We made camp in an established site across the creek and just downstream from where the trail enters the bed. The next morning, we took our time breaking camp as we had a relatively easy day ahead. Our goal was to hike up to the saddle below Nankoweap Butte, cross over and continue south into Kwagunt Creek where we would spend the night. We left camp at 7:55 AM and hiked a short way up the creek to a drainage on creek right (our left) where we would begin the ascent to the Nankoweap Butte saddle. Here, we dropped our packs, crossed over to the creek left side and continued upstream looking for a large boulder adorned by ancient petroglyphs. Rob led the way and we were soon admiring the decorated stone canvas. The visible carved figures included a scorpion, deer, snakes and footprints. The south face of the boulder was marked, "GC 543," a remnant label from the 1960 survey led by Douglas Schwartz. Over the course of the next forty-five minutes, we found first one then a second ancestral Puebloan ruin. Both sites featured stem walls and potsherds. At the second, I found two halved metate grinding stones. We easily could have spent all morning exploring this low plain but we wanted to reach Kwagunt before the sun rose too high.
On two previous trips, to hike the first leg of the Butte Fault Route from Nankoweap south into Kwagunt, I had gone about a half mile up Nankoweap Creek to an unnamed side canyon on creek right (hiker left while heading upstream). Following this narrow canyon about a quarter mile, one reaches a boulder chocked drainage on canyon right. The soil here has been wet with heavily mineralized water from seeps on both visits. Clambering over the boulders up the drainage eventually deposits one into a very flat section of drainage bed. After another four-tenths of a mile or so, the drainage narrows and one has a choice to make: stay right or go left. I've stayed right both times and eventually made it up to the saddle below and northeast of Nankoweap Butte. On this hike with Rob, I wanted to try a different route. We walked upstream only about a quarter mile from our Nankoweap camp site to a drainage just upstream of a large, angled and exposed layer cake of stone. Rob and I followed the mushy slope of the hill up to firmer ground in a shallow bowl offering access to a break in the stone fin atop a ridge. Once through the break, we crossed over the ridge and contoured in a southeasterly direction. We walked across stone ledges for a portion of this section. Eventually we found a fairly obvious track up the last short section of soft, sandy terrain to the Nankoweap Butte saddle. It was 11:30 AM on day two and the two-hour hike from Nankoweap Creek to the saddle below Nankoweap Butte seemed much less work than the route I had used on previous hikes.
From the saddle, we walked two-tenths of a mile east across more soft material to catch the line of a ridge that angles down toward Kwagunt Creek. We followed the ridge a short distance, spending much of the time walking across the angled stony fin atop the ridge. Where the fin abruptly stopped, we had to go right and negotiate a boulder field to get off the fin and down to rock covered soil. Once back on solid earth, we walked a short distance to the top of a drainage on our left. Following game tracks, we made quick work of the descent through this drainage into the main arm of the fault canyon leading to Kwagunt. On previous trips, I had gone down the right side of the ridge to find routes into Kwagunt. The drainage along the right (west) flank of the ridge eventually leads to a dry fall that can be bypassed on the left. It's doable but a real annoyance at the end of a long day. Using the canyon along the east flank of the ridge, we encountered one minor bypass on creek right and another modest bypass on creek left. There was also some minor boulder hopping in the creek bed, itself. However, this route is much less work that the routes I've used previously.
Since you've read this far, there is a fair chance you're looking for beta on the idiosyncrasies of this trek from Nankoweap to the South Rim. Following, are my notes on this expedition length hike:
Kwagunt to Malgosa: Stay right (west) of the obvious deeply cut drainage running along the west flank of Malgosa Crest. About a quarter mile upstream from the junction of Butte Fault Route and Kwagunt Creek is a shallow ridge running roughly parallel to Kwagunt Creek on creek right (hiker left, if heading upstream). Use this ridge to access the slope heading up (south-southeasterly) to the saddle overlooking Malgosa Canyon. Along this ascent, you'll encounter three terraces. The first is at about 4,200-feet elevation and is small in area. The second and third terraces are larger in area, the second at about 4,600-feet and the third at 4,800-feet elevation. From this upper terrace, you'll have the option of going left (east) or right (south) to find descent routes into Malgosa. I've gone right on two occasions, finding a cairned ascent route to a ridge which can be followed down to the east into Malgosa. On both occasions, I exited the ridge to my right after about a quarter mile. It's a steep descent off this ridge onto the side slopes and requires constant attention to your footing. But this route is very doable.
Malgosa to Awatubi: Follow the obvious route through the drainage along the west flank of the impressive stone fin out of Malgosa and up to the saddle overlooking Awatubi Canyon. As you exit Malgosa, you'll need to find a line across debris fans that choke the junction in Malgosa's bed. Rob and I trended to our right before getting into the drainage and following it up to the saddle. You'll alternate between hiking in the drainage bed and along one side or the other, depending on how cluttered the bed is with boulders and vegetation. Near the top, you'll have the option of staying right or veering left. Go left (southeast) to reach the saddle offering the most direct descent path into Awatubi Canyon. If you do choose to go right (southwest), you'll ascend to a point on the ridge about 130-feet above and one-tenth of a mile southwest of the saddle. It's a relatively easy walkdown to the saddle to pick up the descent route into Awatubi.
Awatubi to Sixtymile: There is no reliable water source between Kwagunt Canyon and the east arm of Carbon Canyon. I have found water in Malgosa about an hour downstream from where the Butte Fault Route intersects but this is not a perennial, reliable source. Awatubi has been bone dry the two times I've gone through. Water can be found in Sixtymile Canyon but, as has been relayed to me by more than one hiker who filtered, treated or boiled and drank the water there, one runs the risk of significant intestinal discomfort when drinking water found in Sixtymile Canyon. Rob and I left Kwagunt carrying about eight liters, each. That's nearly 18 pounds of water weight added to an already full pack on the long back country trek. This is the minimum I recommend you carry for the long dry stretch between Kwagunt and East Carbon. Once in Carbon if you've got one-to-two liters of water remaining, I would encourage you to continue on the Lava before restocking the water supply. I've never made it from Kwagunt to Lava in a single day. I recommend making a dry camp in Sixtymile Canyon and finishing the last leg of this stage on fresh legs after a full night's sleep.
The route from Awatubi to the saddle overlooking Sixtymile is, again, fairly obvious. This ascent again follows the western flank of an imposing stone ridge and is the shortest of the three you'll make on this demanding day. Starting in Awatubi at an elevation of 4,430-feet, you'll ascend via a side canyon to a saddle at an elevation of 4,950-feet. The distance is only about half-a-mile but it's all uphill. Along the way, take advantage of occasional rest breaks to glance back in the direction of impressive Kwagunt Butte. The dramatic, curving rock layered form of Kwagunt Butte never ceases to impress. At the saddle, you'll have a fine view to the south and east of majestic Chuar Butte. As you begin the descent into Sixtymile, you'll notice this route is much different from the others. It features less of the grassy, scrub-covered terrain you've been hiking and more scrambling across exposed rock. After negotiating about six-tenths of a mile along this rocky descent, you'll encounter an impassible dry fall which can be bypassed on drainage right (hiker right, too, assuming you're heading downstream through the drainage). The bypass route exits up and to your right, then descends and follows a southerly line down through a drainage along the base of a rocky fin. From the top of the bypass route, you're not more than two-tenths of a mile from the junction with a dry arm that will merge into yours from the right (west). Just downstream of this junction, there is a shelf on creek right with room enough for two tents. I've made camp here on two trips.
Sixtymile to East Carbon: A few minutes downstream from my favorite camping spot in Sixtymile, an inconspicuous creek arm merges from the right (west). Following this creek arm will first take you west then south across open country to the ascent route leading to the saddle overlooking East Carbon. The mile long climb up to the saddle took me and Rob about 90 minutes with no major obstacles along the way. There is some minor boulder hopping, and you'll alternate between hiking in or alongside the drainage, but no major bypasses are needed along this route. Once atop the saddle, take a break and enjoy the view. You've worked too hard to get there to not savor the moment. When you are ready to continue the trek, stay left as you descend and look for a well-defined trail of use. Both hikers and animals follow this pathway along the left side of the main drainage coming off the saddle. After about 15 minutes, you'll come to a junction with a drainage to your right. This junction creates a large, triangular and relatively flat area. From the junction, continue along the established track for another 15-to-20 minutes until you reach an impassible dry fall. At this point the trail of use ends. There is a bypass to the right (west) which includes some rock scrambling until you again find yourself in the main drainage. Some hikers prefer contouring west from the bypass to follow the hill slopes down into East Carbon. I've not taken that route. One significant down climb remains but, beyond that, the main drainage offers reliable and reasonably easy access into East Carbon.
East Carbon to Lava: The walk down East Carbon is easy and awe inspiring. First Chuar and then Temple Butte dominates the scene to your left. On your right, keep an eye open for massive Carbon Butte. Beyond Carbon Butte, the landscape begins to open up and you'll be treated to views far to the south and west of Apollo, Venus and Juno temples. The geology also becomes quite interesting with a variety of exposed layers and formations on both sides of the creek bed. About a half-mile downstream from Carbon Butte, the creek bed passes through an area where seeps dampen the soil with enough moisture for ferns, colorful plants and other vegetation. This water has always looked heavily mineralized and I've never felt an urgency to drink it. About a mile downstream from Carbon Butte, look for an unnamed creek bed merging into the main arm from the right (west). From here, you'll have at least two options to consider in your quest for fresh water. If your objective is to reach the Still Spring in Lava, enter this arm to begin the overland route from Carbon to Lava. My recommendation, however, is that you stay in Carbon, continuing downstream another 20-to-30 minutes to a heavily used river runner trail that connects Carbon with Lava to the south. As well-defined and marked as any Corridor trail, this river runner route follows a wide open valley to the south. Near the Lava end, there is a cairned bypass to your left (east) that avoids an impassible dry fall. The bypass begins with a short but steep ascent to a vantage point offering a view to the south of Lava Creek Canyon. The descent on the other side takes but a few minutes and deposits you into Lava where a colorful and strongly mineralized water flow makes its way toward the Colorado River. From this point, you'll be no more than about 45 minutes from the river, where you will find outstanding camp sites and a fabulous beach by following a trail heading upstream from the mouth of Lava.
Lava Creek Canyon: The hike up Lava can easily occupy a full day in Grand Canyon, especially if you stop to explore some of the interesting sights along the way. From the river to Juno Ruin, you'll cover a distance of seven or eight miles, gain 1,700-feet in elevation, make about a hundred creek crossings and an equal number of boulder scrambles past small water falls in Lava Creek. There are no major obstacles or bypasses along the way, just a seemingly infinite number of insignificant ones. The day begins at the Colorado River at an elevation of nearly 2,700-feet. After about three miles (two-to-three hours), you'll come to a place where a modest flow of water from a spring on your left (creek right) merges from the west with Lava Creek. This is the famous Still Spring site. It's a great place to take a break and have a snack. While you're here, spend some time exploring the area. If you're interested in the history of human endeavor in Grand Canyon around the turn of the 20th Century, there is plenty here to see. About a half-mile upstream from the Still Spring, Lava Creek doglegs to the left (west) and continues in this direction for another three miles to Juno Ruin.
The character of Lava Creek undergoes significant transformation as you continue to follow its path to the headwaters. The creek narrows and feels more confined along this east-west section. You may be tempted to cut bends in the creek by going cross country. But if it's a hot day, bear in mind that the air is warmer and the shade less abundant out in the open away from the creek. Through this section, Lava Creek also seems to cut through the canyon at a slightly steeper angle. At about 3,900-feet elevation, look for a change in the character of Lava. Here, algae growing on the rocks will give the creek a greenish hue. At an elevation of roughly 4,300-feet, the creek bed takes on a deep rusty hue from the rich mineral content of the stones. Not too much farther above this change of scenery at an elevation of about 4,400-feet, you'll encounter the gushing source of Lava Creek. To be honest, the water bursting forth from a jumble of boulders seems rather inconspicuous at first. But upstream of this point, Lava is bone dry. Stay to the left for a relatively easy scramble up some large boulders to the dry creek bed above the source spring.
Not too far above the Lava Creek spring--a couple hundred meters at most--look for a defined trail of use off to your right (creek left). This trail will lead up to Juno Ruin, an ancient granary built into the base of an exposed Tapeats formation. This is one of the better preserved ruin sites I've found in Grand Canyon. You can easliy spend an hour or more, here. There is that much to see. Remember, please, to take only pictures and leave only boot prints.
Lava Creek to Unkar Creek: The ascent from Lava Creek to the Redwall saddle overlooking Unkar Canyon to the south is one of the greatest challenges of the Nankoweap-to-South Rim trek. It will test you physically as well as mentally. The mental challenge is the route finding required to choose a good line to reach your next objective. If you make a mistake on this ascent, it can easily set you back by several hours. In 2011 when I first made this trek, it took me nearly seven hours to hike the one-and-a-half miles from upper Lava to the Redwall saddle. On this trip, Rob, Chris and I made the same ascent in four hours. You may think four hours is a long time to cover such a short distance. Well, you'd be right. It is a long time. But in the context of rugged back country hiking, four hours isn't long, at all.
I recommend you begin by ascending to the right (west) of the large Tapeats outcrop opposite Juno Ruin. After the initial ascent, follow a ridge to the south until you find a descent route into the main drainage. The distance from Lava to this drainage is about six-tenths of a mile. After entering the drainage bed, be on the lookout for a junction with what may seem a minor drainage on your left. You shouldn't have to hike more than about one-tenth of a mile before reaching this junction. This seemingly minor drainage may be obscured by branches from the dense vegetation in the area. Don't miss this turn! If you continue up the drainage you're in, you'll follow its course to the right (west) and end up facing the impassible base of the Redwall below Cape Final. So, go left at the junction and follow this new drainage up toward the base of the Redwall overlooking Unkar.
After a quarter-mile or so of boulder hopping your way up the drainage, you'll come to a field of small Tapeats boulders on your left. This is at an elevation of about 5,150-feet. From here, continue up the drainage a short distance while looking for a place to exit and continue up the steep slope to your right. There won't be an obvious exit. There isn't a well-worn or cairned route. Just pick the line that looks a bit less intimidating than the others. At this point, you'll be about two hours and one mile into the ascent. Over the next half-mile, you'll gain 900-feet in elevation, battle through dense vegetation, cross one or two nasty talus slopes and curse the person who told you this was the way to go. But if you take your time and make good route-selection decisions, you'll reach the saddle in about two hours.
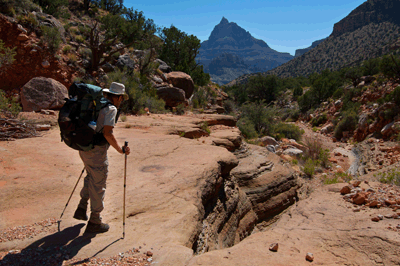
Rob, Chris and I began by paralleling a deeply cut ravine to our left. When we had climbed above a large exposed Tapeats boulder at the head of the ravine, we cut left to angle up toward a Redwall outcrop. We encountered a couple of minor dead ends along the way, but we eventually found ourselves on a clear trail of use leading up and to our left toward the saddle. We arrived atop the Redwall saddle overlooking Unkar at 11:32 AM on the sixth day of our trek. It had taken nearly four hours to negotiate the ascent but that felt like a grand victory to a guy who'd invested a full day covering the same distance just two years ago. This moment may feel like victory but don't waste too much time celebrating. You've still got a hard five-miles ahead of you to find water and a suitable camp site in Unkar.
The saddle is at 6,000-feet elevation. The route into the north arm of Unkar follows the narrow main drainage, and features a lot of boulder hopping and shrub ducking. Some two-and-a-third miles below the saddle at an elevation of 4,700-feet, look for a cairn on your left. This marks the place where you will exit the drainage bed and go cross-country in search of a major bypass route. The bypass avoids the impassible dry falls in the Tapeats/Shinumo Quartzite layers. If you miss the cairn and stay in the drainage bed, no worries. You'll eventually arrive at the dry fall. Simply double-back a short distance, exit to the east and head for a minor hill. You'll hike around the north and east side of the hill. Once around the hill, continue south over a ridge to pick your path down a scree slope into a side drainage. The loose footing can be treacherous and will require your full concentration. At the bottom of the slope, follow the side drainage to your right (west) where it will soon merge with the main north arm of Unkar. There are fine shady spots for a break at this junction and you may want to take some time to hike back up canyon to check out the dry falls you just bypassed. Some hikers have reported finding pothole water here but that has not been my experience.
From the bottom of the bypass, it's another half-mile to the junction with Unkar's southeast heading arm. The two times I've done this hike, I found a narrow, gentle flow of water about a mile-and-a-half downstream from the junction. On this trip, the flow was very weak but it was enough to avoid making a dry camp. The exposed sandstone on creek left where the gentle stream emerges from the creek bed is perfrect for laying out a sleeping bag for a night under the stars. If you prefer to pitch a tent, there are a couple of places large enough to accommodate a small backpacking tent and an abundant supply of stones to secure it.
Unkar Canyon to Vishnu Canyon: Let me be clear, I've accepted the navigation error I made on this day for what it was: a simple mistake. I made a mistake. Everybody does. Mistakes are how we learn. The lesson of this mistake is to not compound one bad decision by making a second or third bad decision. Yes, we ended up losing about two-hours of time searching for a non-existent descent off the Redwall in the north arm of Vishnu Canyon. But we recognized the error. I acknowledged it and we moved on to the next most logical choice. That was exactly how the situation should have been resolved. In the end, we were late arriving at camp and I was a bit embarrassed at having forgotten a critical element of the descent into Vishnu. If that's the worst that happens to you on a back country hike in Grand Canyon, that was a good day.
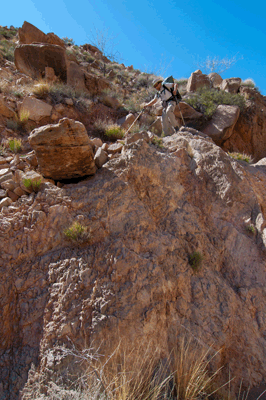
It's about a mile-and-a-half from the Unkar water spot back up canyon to the junction with the southwest arm. From here, you'll hike four-tenths mile to a bypass route on hiker left that avoids yet another impassible Tapeats/Shinumo Quartzite dry fall. The bypass route is up through an obvious break in this layer. Stay right and exit to a ridge overlooking the southwest arm of Unkar. From this perch, you can contour across slope at a slightly downward angle to eventually rejoin the main arm. Once back in the main arm, you'll be at about 4,600-feet elevation with another mile and 1,100-feet of elevation gain to occupy the next two to two-and-a-half hours of hiking. The canyon narrows and the going is slow as you boulder hop your way up the arm toward the Redwall saddle. The last hour of this ascent is occupied by a sporty little climb on canyon right (hiker left) that requires some hand and toe climbing up a narrow and crumbly Redwall ridge. Once past this climb, about one-tenth of a mile of steep hiking remains to reach the saddle.
At the saddle, you'll enjoy spectacular views to the south of Krishna Shrine and, of course, Vishnu Temple. Before leaving, take one last long look back at dramatic Jupiter Temple to the north. This is your chance to say farewell to northeastern Grand Canyon. The descent route into Vishnu Canyon covers about nine-tenths of a mile and 870-feet of vertical elevation. You'll descend nearly 600 of those feet in the first quarter-mile. The descent route begins not far from the saddle. Head down toward the fault staying right of the break in the Redwall. Watch for signs of past traffic, animal or human, and follow it through the Redwall break. The route stays generally to the right for a quarter-mile until exiting out of the fault onto Muav benches at the base of the Redwall. Follow the benches around to your right into the northern arm of Vishnu. Soon, you'll encounter a break in the Muav layer which has been used by previous hikers to reach the canyon bed below. The talus descent is very loose and requires constant attention to your footing. If hiking in a group, avoid hiking directly above one of your companions. One loosed boulder could easily lead to mishap and injury.
It's about a quarter-mile from where you will enter the bed of the north arm to the junction with the main southwest leading arm of Vishnu Canyon. From this junction, you'll go right (southwest) and hike another one-and-a-half miles to the Shinumo Quartzite narrows. Along the way, you'll likely encounter flowing water, suitable for filtering or treatment and drinking, at several locations. When you arrive at the entrance to the Quartzite narrows, you have a couple of options. Either break out of the creek bed by going to your right (west) up and onto the Tonto level or continue into the narrows. If you choose to head up to the Tonto level, contour to the west and south until you reach a major side canyon cutting a path through the Quartzite toward the narrows. A spring in the Muav at the head of this side canyon is a reliable water source. The water flows from the spring down through the drainage all the way to the Shinumo Quartzite narrows. If you stay in the creek bed and enter the narrows, hike downstream another six-tenths of a mile until you reach a place with cavernous overhangs on both sides. This will be just downstream of the junction with the aforementioned side canyon. Water is usually present at this junction. The overhang on hiker right offers several spots to lay out a sleeping bag or pitch a tent. This location is the famous Overhang Camp.
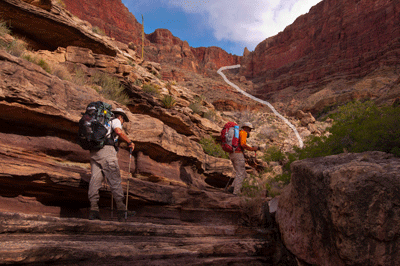
Vishnu Canyon to Clear Creek: There are two options for getting from Vishnu Canyon to Clear Creek. One, is to follow the Tonto plateau south and west around Hall Butte, across the unnamed side canyon west of Hall Butte, continue west around Hawkins Butte, then north and west around the unnamed side canyon draining Angels Gate between Hawkins Butte and The Howlands, and finally going north and east around The Howlands to one of several approaches into the east arm of Clear Creek. If you choose this option, I recommend you budget a full day for the trek and carry enough water from Vishnu for a possible dry camp on the Tonto. Soon after rounding Hall Butte, look for a descent route into the nameless side canyon. Though nameless, this canyon is not unknown. It has earned a few popular nicknames, "Double Disappointment" being the only one suitable for a public forum. Half-an-hour of careful hiking should get you down the ramp through the Tapeats and into the creek bed. There is no reliable water source in this side canyon. Head up canyon to look for an exit on your left, There is a ramp that ascends between the Tapeats and a tower which has broken away from the canyon rim. Thirty-to-forty minutes of careful hiking should return you to the Tonto level and back on course for Hawkins Butte.
Once you get around to the west side of Hawkins Butte, there is a route down through the unnamed side canyon that leads to the Colorado River near the mouth of Clear Creek. I have not hiked this route but, from what I've read, would not recommend this for a solo hiker. It is described as steep and treacherous. In some spots, ropes may be needed to lower packs. If you continue along the Tonto, the nameless canyon that drains Angels Gate to Eightythree Mile Rapids seems unending. When I followed this route in 2011, I needed four hours to get from Hawkins Butte to a dry camp at the head of a drainage cutting into the east arm of Clear Creek. A cairned route descends from the Tonto into this drainage and the drainage can be followed north into the east arm.
The second option when hiking from Vishnu Canyon to Clear Creek is the high saddles route. It is shorter in distance than the first option and should allow you to reach Clear Creek in a single day. At the very least, the east arm of Clear Creek, where water is reliably found most of the year, is reachable in a single day. This route leaves Vishnu Creek via the side canyon cutting through the Quartzite from the northwest. Rob, Chris and I stayed right as we ascended this drainage. Just below the Muav, look for a break on your left through which you can get above the Muav ledges. Continue up to the base of the Redwall. This is a loose scree slope so, stay focused and do not trust any foot or hand holds without first testing them. Also, spread yourselves out so no one is hiking directly below another person. Rock falls happen easily in this area. When you reach the base of the Redwall, follow the ledges upward and to your right (north) to reach the fault break through which you can access the top of the Redwall. Hikers should ascend one at a time through this fault as rocks and debris can easily become loose, creating a potential risk for anyone immediately below. Near the top of the fault, you can break out to your right and follow a more gradual slope to the top of the Redwall.
Atop the Redwall, take a break to enjoy inspiring vistas in all directions. Hall Butte is to the south and can be easily summited, if that is your inclination. Wotans Throne dominates the skyline to the north. Angels Gate is off to the northwest, with Dunn and Hawkins buttes sharing the same Redwall arm. More landmarks are visible off in the distance. When you are ready to continue hiking, head north to pick up a trail of use which can be followed around the bay to the Redwall saddle overlooking the east arm of Clear Creek. Budget about ninety minutes for this section of the hike. The real excitement begins when you're ready to descend into the east arm of Clear Creek. This is a sporty descent with several eight-to-fifteen foot down climbs, several having significant exposure. Ropes or webbing aren't a necessity but would be good to have along, just in case. If you're hiking in a group, I recommend the down climbs be done one person at a time. Send your most experienced and confident climber down, first, to scout the best foot and hand holds.
When you get down to the base of the Redwall, continue down the main drainage until you get to an intimidating collection of large choke stones. Here, you should be able to break out to your right (east) onto a slope with game tracks that roughly parallel the main drainage. The hiking will be much faster following the game tracks for the next quarter-mile or so. Eventually, you will reach a junction of two drainage arms. This will be a good place to re-enter the drainage bed and continue north toward the east arm of Clear Creek. At a bend where this drainage doglegs to the left (west), exit the bed and contour west across the Tonto level staying above the drainage. You'll follow the Tonto for one-quarter mile until reaching a break in the Tapeats that allows access into the east arm of Clear Creek. Look for cairns marking this route. Once through the break, the route angles left (west) and descends along the base of the multi-layered Tapeats. Then, the route switchbacks to the east across a grassy slope. The route switchbacks a couple more times before leading you across the face of a large Tapeats block and into the creek bed.
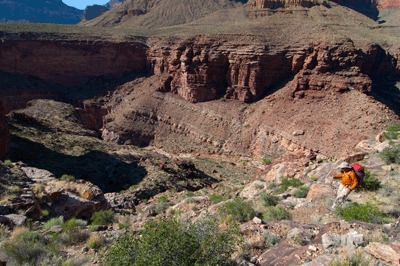
Now that you are in the east arm of Clear Creek, the hardest work of this lengthy Nankoweap to South Rim trek is behind you. The east arm is a walk down to the junction with the main arm of Clear Creek Canyon. You'll probably be within a few steps of flowing water for much of this section. As you approach the main arm of Clear Creek, look for opportunities to break right where you'll find a well-worn path leading upstream to the Clear Creek campground. The hiker path crosses Clear Creek a couple of times before settling in on creek right (hiker left heading upstream) for the balance of the journey. You will pass one or two very nice camp sites on the creek left (hiker right) side of Clear Creek. After the final creek crossing, there are two or three nice camping spots south of the main, established camp site. When it's running clear, Clear Creek water is some of the best I've tasted in Grand Canyon. Even if you don't plan to make camp here, I highly recommend building a break into your itinerary to dump the swill you've been drinking and replace it with Clear Creek water. While you're at it, why not soak yourself in the creek to wash away a few days of collected trail dust?
Clear Creek to the South Rim: From here on out, you will likely be following constructed and maintained trails to the South Rim. After a week or more of nothing but back country route finding, Clear Creek trail, the Kaibab and Bright Angel trails will all seem like express ways. Other than stopping to chat with the occasional hiker, the biggest priority will be drinking in the amazing views. Though not as challenging as the route finding, there is something to be said for the simplicity of just being able to open up your stride and hike.
Now that we've touched on the highlights of each stage, I'd like share some personal highlights from this year's Nankoweap to South Rim trek. In addition to the ruins seen in Nankoweap Canyon, Rob and I visited a small, discreet ruin site in Kwagunt. This was a place I'd found during a 2009 hike and it strikes me as an odd, little out-of-the-way ruin. It doesn't quite fit in. Of course, all three of us enjoyed exploring Juno Ruin in upper Lava. This is a really impressive site, featuring a nearly intact granary large enough to accommodate several adults, stem walls from adjacent rooms and pictographs on the overhang ceiling. We also an anonymous ruin site in Clear Creek near the junction with the east arm. The weather was kind of Jekyll and Hyde. The first two days were wintry cold. Rob and I were dusted bu graupel during the hike from Nankoweap up to the Nankoweap Butte saddle. The camp in Sixtymile was bitterly cold, but the sun broke out from the clouds on day four and we enjoyed more seasonable weather the remainder of the trip.
Despite the wintry weather, we picked a great time of year to be in the Canyon. The cactus and wildflowers were nearing their peak. We saw Hedgehog, Prickly Pear, Beaver Tail and Claret Cup cactus. All were in bloom. Wildflowers were bursting with spring color, including Mormon Tea, Indian Paint Brush, Globemallow, Prince's Plume, Mariposa, Cliff Rose and Brittlebush. We passed several blooming Red Bud trees. Of course, we encountered endless fields of Utah Agave and Banana Yucca. We even saw Sacred Datura> Uunfortunately, this was during the day when the plant was not one in bloom. Other than birds and the frequent small lizard sighting, the most exciting wildlife interaction we had was probably an encounter with a small rattlesnake. This was during the hike out of Vishnu up to the Redwall. Chris was the only one of us to see the snake. By the time I arrived on the scene, the little buzzworm had slithered beneath some rocks. I could hear the rattle but didn't see Mr. Pink. Rob did receive a visit from a very interesting creature at our camp in Nankoweap. A fine specimen of a yellow Cotalpa Consobrina beetle made itselft at home near Rob's tent on our first night in the Canyon.
Without question, however, the best surprise of the trip happened on the fourth day. Rob and I were hiking from Sixtymile to Lava. Walking down Carbon, we saw a group of about fifteen people resting in the shade. They were on a day hike from a river trip and we ended up spending the next couple of hours with them. We arrived just in time to join them in hiking the trail connecting Carbon with Lava. As much as I enjoy the solitude of backpacking in Grand Canyon, I have to say it was really nice to be around other people. We reached the Colorado River at Lava beach just as another river party was pulling in to make camp for the night. The Carbon group soon loaded themselves into their rafts and were on their way downstream. It seemed to take some time for the new group to warm to me and Rob but, eventually, we all became fast friends. They even invited us to join them for dinner, an outstanding meal of steak, potatoes and salad. The dessert was out of this world. But admittedly, what I enjoyed most was quaffing a cold beer.
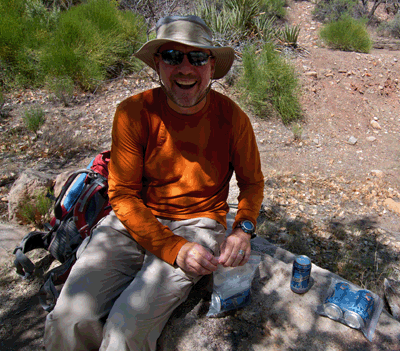
Speaking of beer, Chris Forsyth did end up connecting with me and Rob at Lava. Just as the dinner conch was sounded, I saw Chris emerge from behind a point upstream on the Colorado River. He was in his pack raft and, after a few minutes paddling, he reached the river right side just upstream from camp. I raced up along shore to meet him and found a cold and wet guy with cramping muscles. Considering he'd just completed a thirteen-mile hike and river crossing with a full pack on warm April day, I wasn't surprised. Soon, however, he was feeling well enough to join us for dinner. The next day during our lunch break at the Still Spring, Chris pulled out two plastic bags containing four cans of Blue Moon Ale still encased in ice. The simple pleasure of savoring an icy cold Belgian-style ale deep within Grand Canyon is unsurpassed on my life list of backpacking adventures. I mean, who enjoys an icy cold anything that far off the grid?
To learn more about the Nankoweap-to-South Rim trek, please visit Rob Jones site and read his report, Roving the Happy Horsethief and Butte Fault. The below "Trail Map" link will take you to a page featuring an overview map for the entire trip plus maps for each day's stage. The "More Pics" link will treat you to many more images from this ten-day adventure. Large format prints of several images from this trip are available for purchase through Bill Ferris Photography
 |
 |
 |